Saturday, May 16, 2009
New URL address
If you are reading this post then you found my new blog address. The reason for the name change is because I'm a dumb dumb and forgot about using the "Scentsy" name in my title. It's against the rules and it was brought to my attention so I changed to www.ourwicklessteam.blogspot.com

Saturday, May 9, 2009
How to make Samples
What you'll need to make your samples: A Brick or other Scentsy Bar, PYREX cup, Cutting Board, Knife, molds.
The first thing I do is cover my counter with wax paper for any spills. I use a PYREX measuring cup (1 cup size) because of it durability. Plastic containers can get very hot and melt or warp.

I start by cutting off one section at a time (1/6 of Brick is equivalent to 1 Scentsy Bar) and cutting into smaller cubes.

Put the cut up wax into the PYREX. You want to do small batches at a time so the wax doesn't have to get as hot and it will go faster.

I put it into my microwave and set my power at 5 or 50% and melt in 1 minute intervals for the first 3 minutes. At this point depending at how hot it is just go another 30 seconds.

Total melt time at 50% power takes me about 3 1/2 minutes. You don't need to melt 100%. Mine got about 90% and after I stirred for a second it melted the rest.

I bought my molds at Michael's. They are small enough to fit into my little baggies and I can get 100+ samples from each Brick. Carefully pour melted wax into molds. You might need a heat pad when handling the PYREX. Especially after many uses it is very hot.

I got 26 molds filled with that one section. Molds can also be bought at the dollar store, Walmart and other crafty stores. I know the Dollar Store sometimes sells the silicone ones and they are usually themed depending on the season. These tend to be too big for my baggies so I just stick with these.
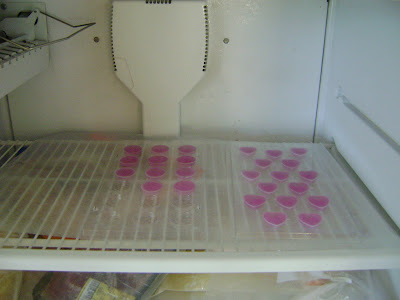
I clear out my freezer and lay down wax paper. (I learned this lesson after I made a mess in my ice maker and had to defrost my freezer to fix it!) Leave them in there for about 10 minutes until they are hard.
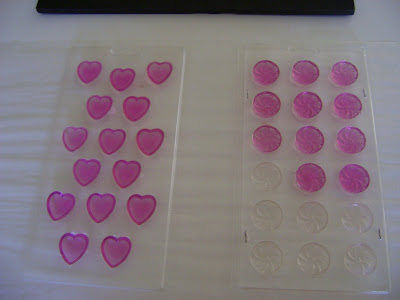
Then just turn them over and gently press on them to pop them out. Again I do it on top of wax paper.

Here is my first batch of samples. Cute, huh?
 Also at Michael's I buy the little bagettes. I get the 2 x 3 size. They can be found in the bead isle. I think it was around $2.99 for 175 bags. I also print out what the sample is on "return address" labels. They are 1/2 x 1 3/4 size. I buy the Avery brand and download template #5167 for these. Someones made a suggestion to add to your scent label a "warning that says something like, "Warm Me don't Eat Me!!! Candle wax sample". I like that idea so I'll be adding that to my scent label.
One option for handing out is to simply place a label with your info on it and the label stating what scent it is. (my info label is clear but the scent label is white-doesn't really matter just wanted to specify what you were seeing)
 Or you can attach it to a business card. Right now money is tight so I don't have alot of business cards so labels is how I'm doing it for now.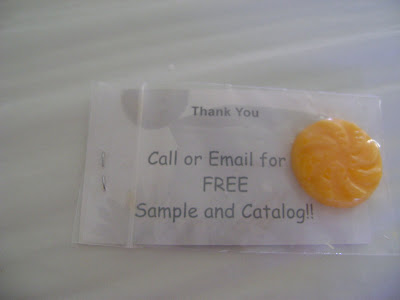
Samples are a great way to get your name out there and leaving them a scent will hopefully get them coming back for more. If you get the SOTM/WOTM deal use your brick to make samples. When my customers aren't happy with a scent I take the unused bar back and replace it for them. I then make samples out of the rest of it.
If you have any questions for these please let me know. You can leave a comment or email me at rebeccakern1@hotmail.com If you have a different way in making your samples I'd love to hear about it.
(For those of you wanting to see the "How to make a Plug In display" I'll be putting that up late next week. If you would like to see anything else up here just let me know)
Thanks,
Becca
Monday, May 4, 2009
New Instructions Coming...
I've gotten alot of emails from people wanting instructions on the Plug In displays. I'll be making some more next week so I'll get the pics up by the end of next week. As a side note I didn't come up with these instructions. A gal on the Scentsy Forum had it posted. You can search for plugin display and find her instructions. She has a picture of the finished product just not detailed pics of a step by step which I will do.
I'm also going to be making some samples this week so I'll get that posted sometime in the next few days.
Thanks to all of you who are enjoying my site. If you'd like anything else done on here just let me know and I'll get it up.
Becca
I'm also going to be making some samples this week so I'll get that posted sometime in the next few days.
Thanks to all of you who are enjoying my site. If you'd like anything else done on here just let me know and I'll get it up.
Becca
Wednesday, April 8, 2009
How to make a Peg Board
Some one asked how I made the peg board from an earlier post. I didn't take pictures while I was making it but it is really easy so I'll just explain. I went to home depot and bought a 2 x 4 peg board. It came white but I spray painted it Black. My husband cut it into 3rd's (16 inch sections) then he put some hinges on to connect the peices. You can also have home depot cut the board for you if you can't do it yourself. Buy 4 hinges and attach sections together.

I decided for transporting reasons to tie some ribbon on both ends so it would be easy to carry. The way the hinges were put on the board, it didn't close in on itself easily. I think if I had put them on the back side it would have worked. I'm not sure...but by that point I didn't care. With it like this I'm able to keep some of my pegs still attached while folded. Which gave me less set up time.

The pegs I bought were the 6 inch ones. They hold 6 bars on them. I have 20 pegs that I space out on my board. I could easily have more on but I liked things more spaced out.

When I did my show I think I had around 70 bars on here. I was very happy with the look of the peg board being Black. It matched my Scentsy Table Cloth I got from Scentsy Success.

I decided for transporting reasons to tie some ribbon on both ends so it would be easy to carry. The way the hinges were put on the board, it didn't close in on itself easily. I think if I had put them on the back side it would have worked. I'm not sure...but by that point I didn't care. With it like this I'm able to keep some of my pegs still attached while folded. Which gave me less set up time.
The pegs I bought were the 6 inch ones. They hold 6 bars on them. I have 20 pegs that I space out on my board. I could easily have more on but I liked things more spaced out.
When I did my show I think I had around 70 bars on here. I was very happy with the look of the peg board being Black. It matched my Scentsy Table Cloth I got from Scentsy Success.

Tuesday, April 7, 2009
How to make Basket Testers at Home!!
To get started add enough water to a skillet to come just under the bottom of the lid of Party Testers. I did about 8 at a time. Heat at a low-medium temp. My stove temp goes from 1-10 and I had mine set to 4 the whole time. It took around 8 minutes to melt the PT about 75%. There's no need to melt all the way. Just enough so it is pourable. The bottom melts first so some times I used a tooth pick and carefully pushed down to still solid wax to bring the melted part to the top. I only had to do it a few times.

When they are melted enough remove from water bath and carefully open PT. I used a dish towel to help get a grip on jar. On some of my jars the plastic was really soft so again be careful when gripping and opening not to puncture or spill.

Here the wax is about 75% melted. All I did was slowly pour the wax into the Basket Tester containers. Depending on how fast you are working and how many you melted at a time, you might want to take the skillet off the burner and take one PT out at a time. Otherwise, take them all out and put your next set melting while you are pouring this set.

Be sure to have yourself completely organized before you start melting to wax. It goes much faster than you think! I was doing 2 sets today so I had all my containers in alphabetic order and separated for the two sets. I didn't want to have to go thru and separate the two sets when it was all done. When I was ready to pour I put both containers for each scent under each PT. Then I quickly (but carefully) poured each into the BT's.

I used the lid as a "catcher" for any spilled wax. Once the wax set enough I closed each one and put into the correct pile. By then the melted wax in the PT cooled off enough to replace the lid and put away.

Here's what I used to keep my two sets separated. Behind these you can see my BT's in alphabetic order. That made it easier to find when needed.

Total, it took about 2 hours to make these 2 sets. It wouldn't have been much longer for additional sets. I bought these plastic containers at http://www.samplecontainerstore.com/ They were a GREAT company to buy from! The size I got were the 1/9oz plastic containers. They included labels already printed with the Scentsy Logo on the front with the scent name and code. Also, on the bottom was my info (name, web address, email, and phone #) They will customize your order with your information. I bought the kit that included 240 containers (enough to make 3 sets of BT's) 480 custom labels (enough for top and bottom) for $47.99 if you include the code "scentsy" they gave an additional 5% off order. My shipping and handling was $8.95 which brought my total to $54.54 I got it within 3 days of ordering!!
 I stacked 8 pennies to show how big these containers were. They were as round as a quarter (I didn't have any quarters to show that comparison)
The company also had a smaller size but I liked the bigger ones. They hold about 1/2 teaspoon-1 teaspoon of melted wax in them.
This was my first attempt at making my own BT. I've bought 2 sets perviously from Scentsy and love them, but I just can afford the $60 they cost. I think these came out looking very professional and much smaller to mail to my out of state customers. If you have any other suggestions please leave a comment for others to read. I'm a very visual person and while instructions are great, seeing what it's supposed to look like always helps me better!
Any questions please email me at: rebeccakern1@hotmail.com
Thursday, April 2, 2009
This is a test
This is a test on Posting your own Blog Post and Pictures. If you'd like to post on this blog then email and I'll give you the private email address that will allow you to do that. That's how I did this post and it worked great! my email is: rebeccakern1@hotmail.com
Rebecca
Rediscover Hotmail®: Get quick friend updates right in your inbox. Check it out.
Rebecca
Rediscover Hotmail®: Get quick friend updates right in your inbox. Check it out.
Day of Dance
Deanna Jones and I did an event called Day of Dance. It was to help promote Women's Heart Health. It was a great 1st event for both of us! I took about 18 warmers and 16 plugin's and like 70 bars. I wish I'd taken more plugins as those sold the most! But I really wanted to show what the warmers looked like. So many people say, "I didn't think they were that BIG!" Luckily I bought 80% of my stock in February at 10% off and sold it at full price. (they do another 10% in August before the new catalog) It was my first event and I was really happy with my turn out. The event was mostly a "get contacts" and hand out free samples so I didn't have high expectations. Thankfully, Deanna came with me and I swear half the people who wanted to buy a plugin walked away with a Perfect Scentsy! (2 warmers and 6 bars) that woman call up sell like crazy:-)
I stressed over my table decorations for a week but it turned out good I think. I got some great contacts out of it and sold enough to break even.

Here's Deanna and I!
 My husband made the peg board and the plugin display's for me. They were really simple and if you'd like directions I can email them to you.
 I pretty much brought one of each out of the "Collections" warmers with a couple other randoms that I still had from previous WOTM. I also had one of each of the plugin's. The dandy sold out the fastest.
Subscribe to:
Posts (Atom)